A VPN (Digital personal community) is an encrypted tunnel that extends over the general public community. It permits customers to browse and entry sources securely over an Web reference to excessive privateness and confidentiality.
[ You might also like: 13 Best VPN Services with Lifetime Subscription ]
ProtonVPN is a high-speed Swiss VPN that protects helpful data, corresponding to passwords, by an encrypted tunnel. It affords vital options corresponding to:
- Full disk encryption with ProtonVPN servers to assist defend information from assaults.
- Robust VPN protocols corresponding to KEv2 / IPSec and OpenVPN.
- Strong encryption with AES-256 for community encryption, 4096-bit RSA for key alternate, and HMAC SHA384 for message authentication.
- Encryption Encryption packages with full confidentiality. Because of this encrypted site visitors can’t be intercepted and decrypted later if the encryption key’s compromised.
- No log coverage. Your data or Web exercise won’t be tracked.
ProtonVPN affords quite a few server places, and as of this writing, it boasts over 1200 servers distributed 55 lands.
On this information we’ll present you tips on how to set up ProtonVPN On Linux.
Register for a ProtoVPN account
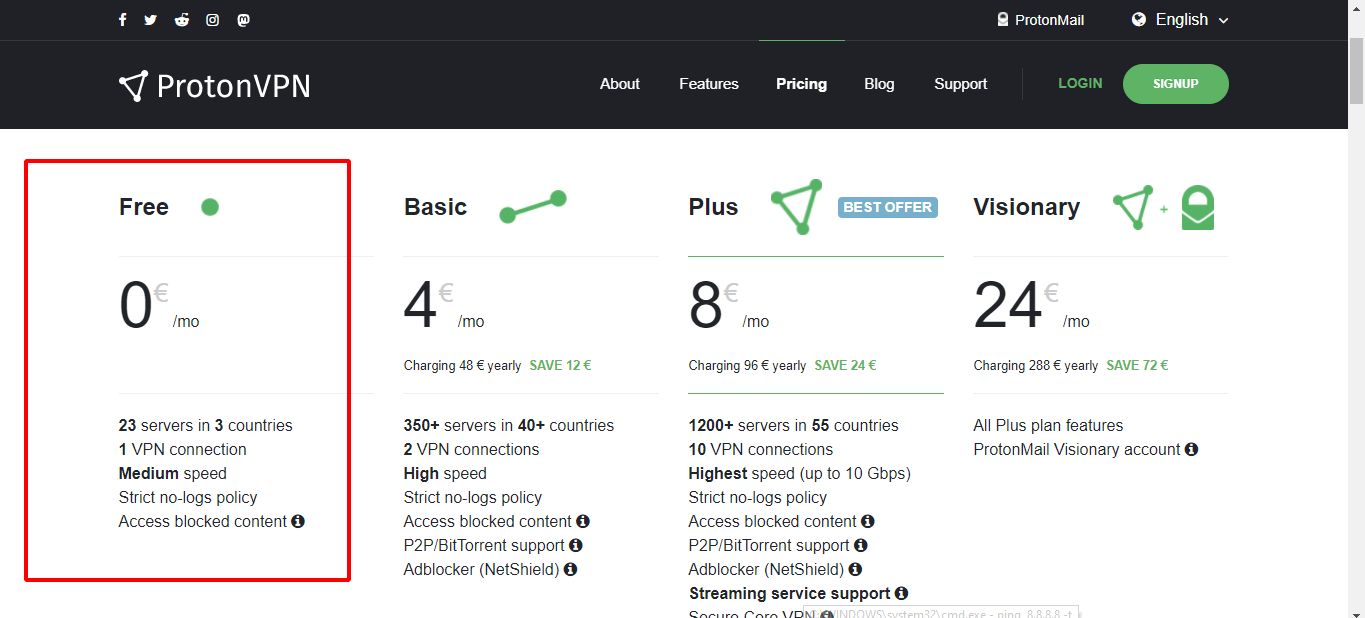
Step one, above all, is to create a ProtonVPN account. You are able to do that by going to ProtonVPN official website and click onPricing-tab.
Proton VPN affords 4 pricing fashions, particularly: Free, Fundamental. Plus and Seer. For demonstration functions we useFreeA plan that means that you can take a look at ProtonVPN free of charge for as much as 7 days. With ‘FreePlan to have entry to 23 servers divided into 3 international locations.
So click onGET FREE‘-handleFreepossibility.
This can take you to the Registration web page, after which you will want to enter your data. An OTP will probably be despatched to your electronic mail account to activate the account.

As soon as logged in, go to the left sidebar and click onAccountthen ‘OpenVPN / IKEv2 usernamepossibility. This appears like OpenVPN / IKEv2 username and password data.
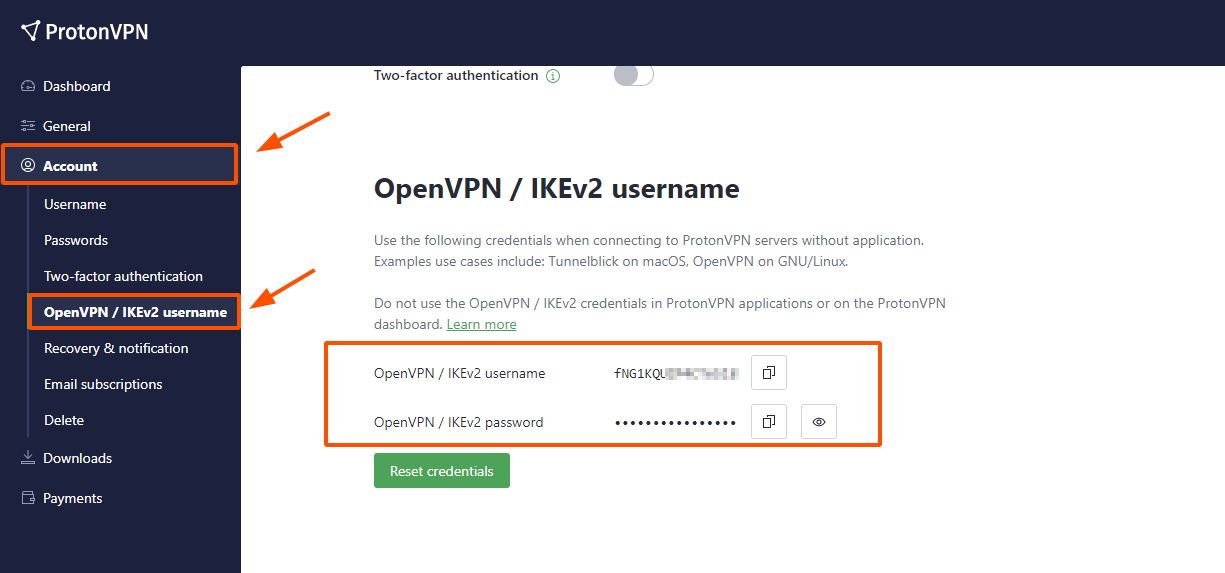
Copy and paste this data elsewhere, as you will want it later on this information in the course of the Proton VPN configuration.
Set up ProtonVPN on Linux
With ProtonVPN already created account, the following step is to put in ProtonVPN. VPN takes benefit IKEv2 / IPSec and OpenVPN protocol. OpenVPN the protocol helps each TCP and UDP and for that reason we use OpenVPN on the Linux desktop.
Set up OpenVPN, run the next instructions:
Set up OpenVPN on Debian / Ubuntu
$ sudo apt replace
$ sudo apt set up openvpn dialog python3-pip python3-setuptools
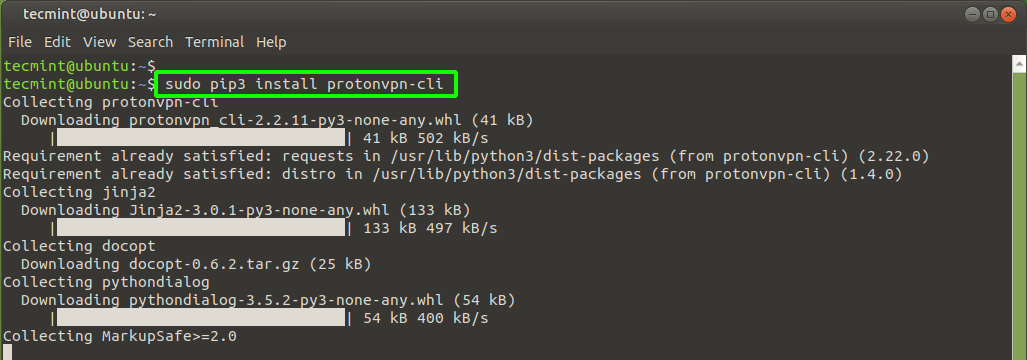
Then set up ProtonVPN CLI utilizing the pip packet supervisor.
$ sudo pip3 set up protonvpn-cli
Set up OpenVPN on RHEL / CentOS 8 and Rocky Linux
Pink Hat derivatives corresponding to RHEL / CentOS, Fedoraand Rocky Linux, execute the displayed instructions.
$ sudo dnf set up -y openvpn dialog python3-pip python3-setuptools
$ sudo pip3 set up protonvpn-cli
Set up OpenVPN on ArchLinux / Manjaro
Click on Archive to run Arch-based distributions.
$ sudo pacman -S openvpn dialog python-pip python-setuptools
$ sudo pip3 set up protonvpn-cli
Set up ProtonVPN on Linux
When required OpenVPN packages are put in, the following step is to configure ProtonVPN On the Linux desktop.
To do that, run the command beneath.
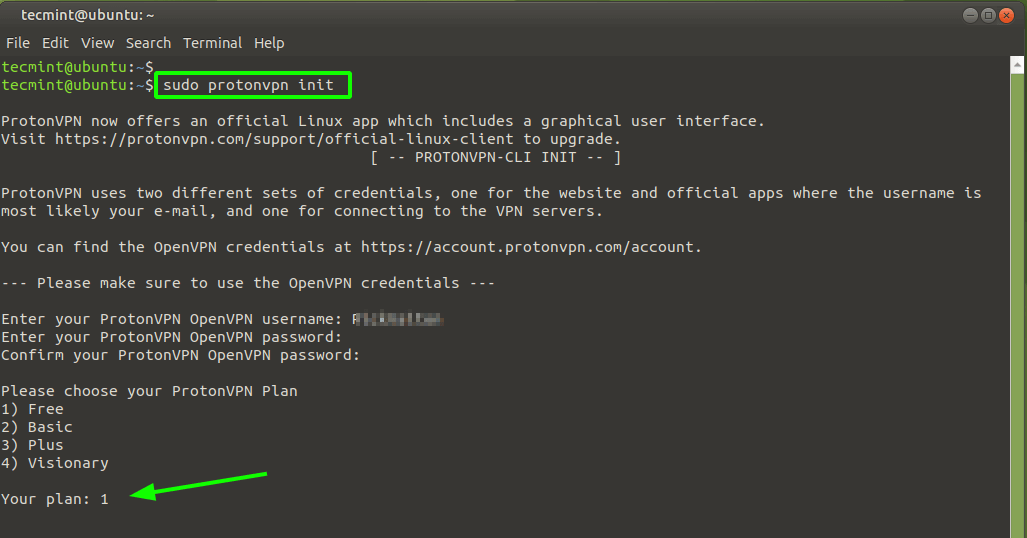
$ sudo protonvpn init
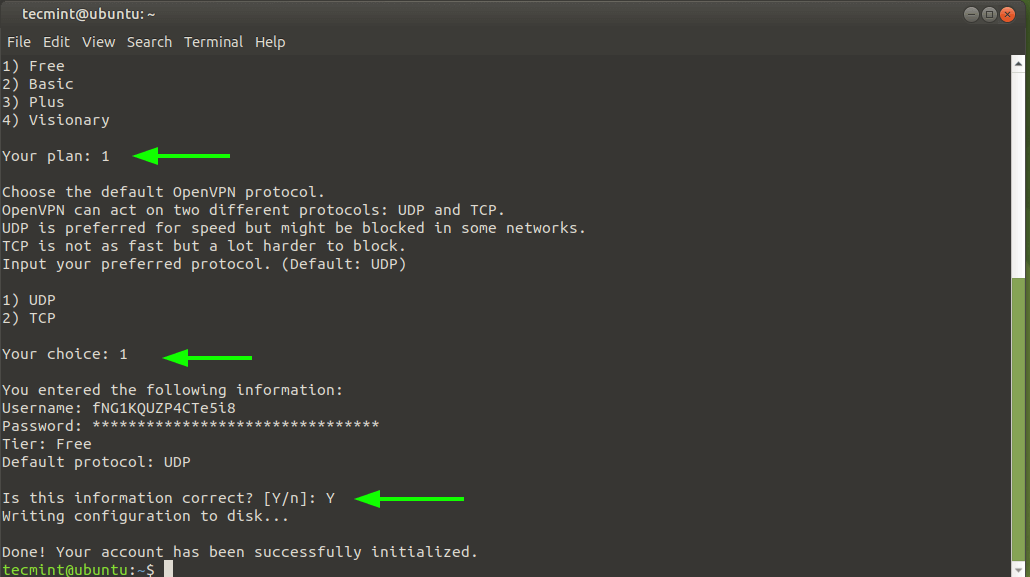
This can information you thru just a few configuration steps. It’s essential to first enter your OpenVPN username and password. Keep in mind the small print we advocate copying and pasting into one thing? These are the small print you should present.
Due to this fact, enter your username and password and make sure your password.
Subsequent, write 1 select a fundamental plan that’s the plan we use.
Subsequent, you should select both TCP or UDP protocol. Each work nice, however for the sake of pace, we advocate you UDPand subsequently write 1 and hit COME IN.
Lastly, a abstract of the chosen configurations is displayed so you may evaluate them. If all the pieces appears good, hit ‘Y’ and press COME IN. In any other case, press ‘n’ return and begin over.
Disable IPv6 on Linux
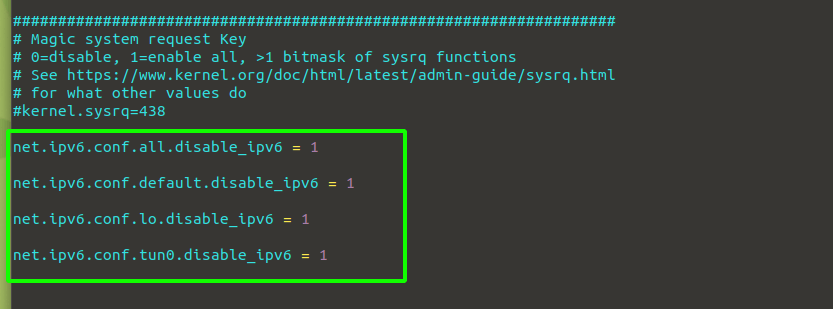
As a result of ProtonVPN the shopper doesn’t present assist for the merchandise IPv6, greatest follow requires that we disable it to keep away from IPv6 leaks. You are able to do it by opening /and so forth/sysctl.conf configuration file.
$ sudo vim /and so forth/sysctl.conf
Lastly, paste the next traces
web.ipv6.conf.all.disable_ipv6 = 1
web.ipv6.conf.default.disable_ipv6 = 1
web.ipv6.conf.lo.disable_ipv6 = 1
web.ipv6.conf.tun0.disable_ipv6 = 1
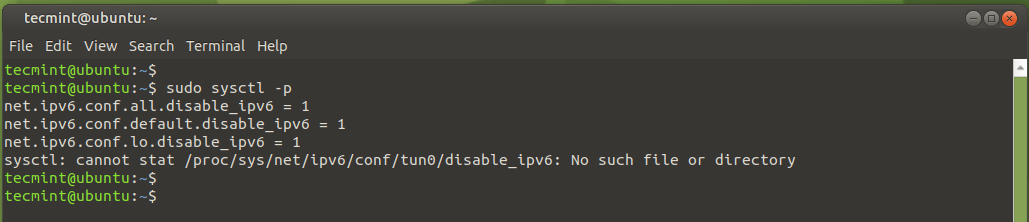
Save the adjustments and exit the settings file. Run the command to proceed making adjustments:
$ sudo sysctl -p
Hook up with ProtonVPN on Linux
We now have accomplished a lot of the configurations. The one step left is to determine a safe connection to one thing ProtoVPN servers from the Linux desktop utilizing the ProtonVPN consumer.
To attach, run the command:
$ sudo protonvpn join
The free plan means that you can select from three international locations: Japan, the Netherlands and the USA. Any of those work simply positive. Right here. we’ve got chosen Japan.

Subsequent, choose the server location within the nation you chose.
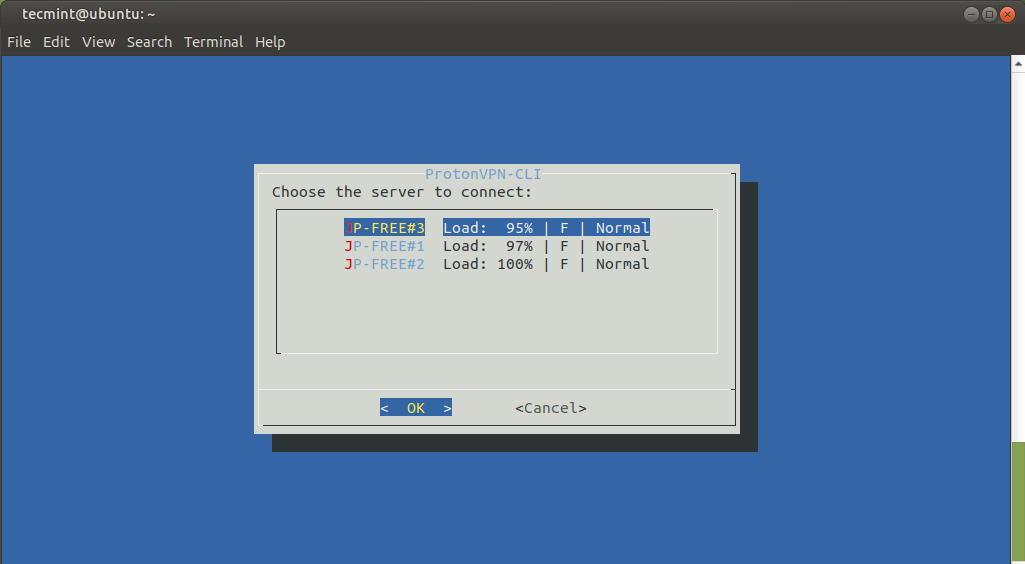
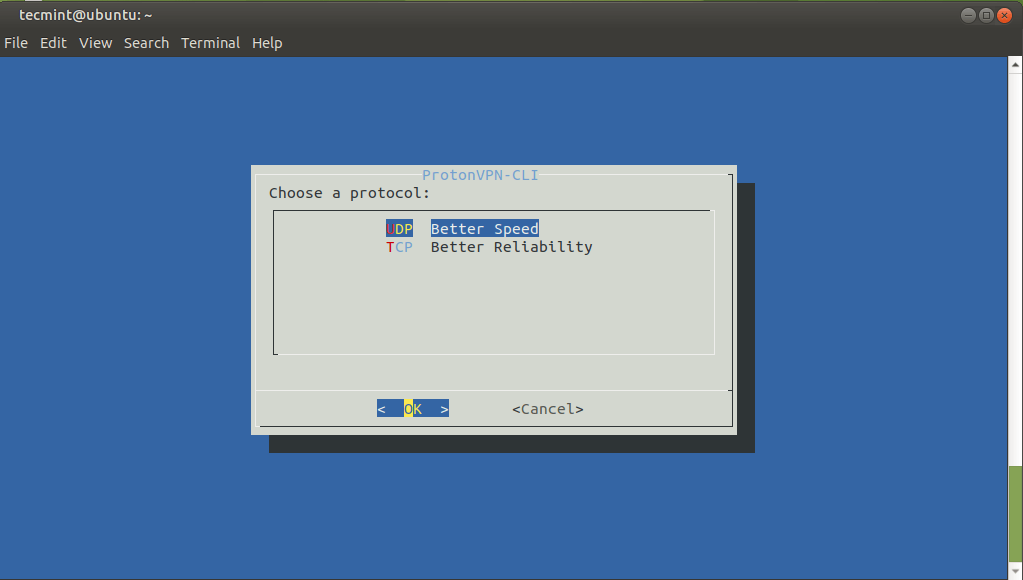
Subsequent, you should choose a protocol. As earlier than, choose UDP for prime speeds.
A number of seconds later, a safe connection is established as proven. Should you get an error, return and reinstall ProtonVPN based on step 3.

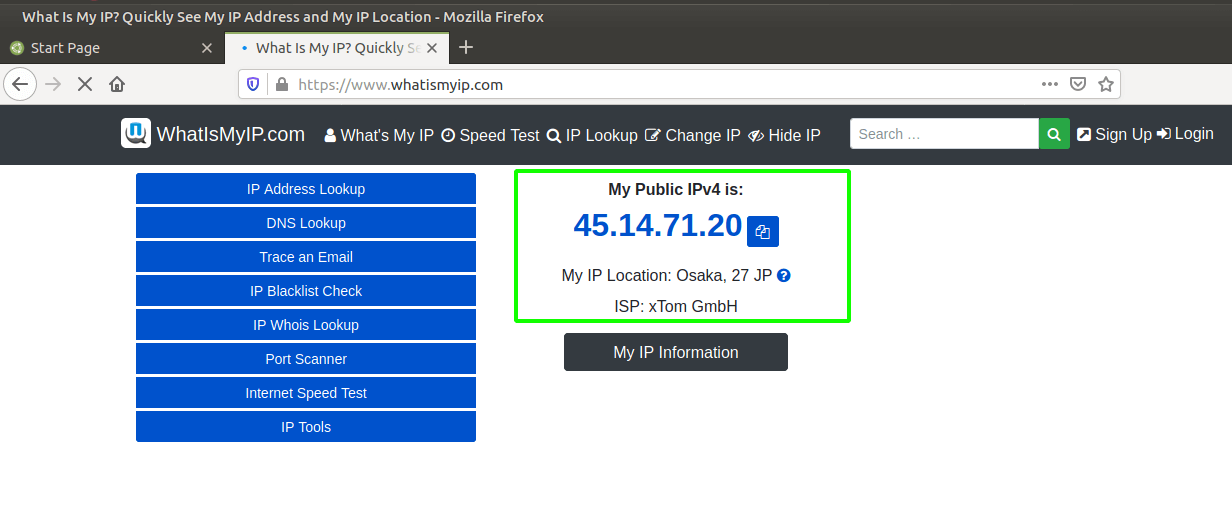
You possibly can affirm the IP change out of your internet browser by visiting https://whatismyip.com. The outcome confirms that our location has modified to Osaka in Japan, which confirms that our dedication was profitable.
Disconnect from ProtonVPN
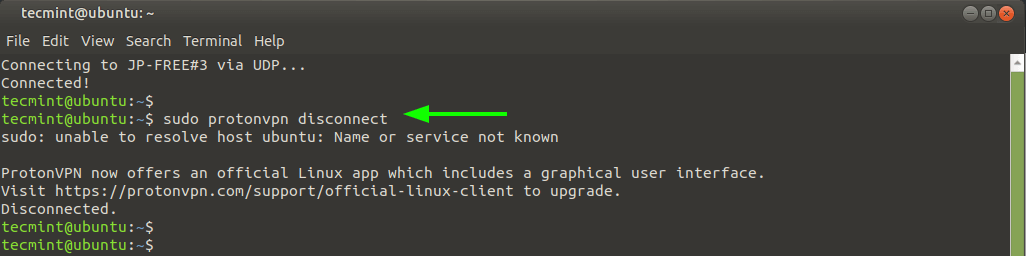
If you’re prepared ProtonVPN service, you may disconnect with the command:
$ sudo protonvpn disconnect
And this makes right this moment our information on tips on how to set up and use Proton VPN on Linux.
Should you respect what we do right here at TecMint, you should contemplate:
TecMint is the quickest rising and most trusted neighborhood web site for every kind of Linux articles, guides, and books on-line. Tens of millions of individuals go to TecMint! Search or browse 1000’s of revealed articles which are accessible to everybody.