By way of creating web pages, one among many greatest strategies to get your web page up and working is to utilize CMS (content material materials administration system), which is commonly included PHP code and the entire themes and extensions you need.
Apart from WordPress, one different trendy CMS Is Joomla. Joomla is a free and open provide CMS constructed on PHP and outlets its data in a SQL-based database engine throughout the background.
On this text, you may be taught to arrange Joomla on Ubuntu 20.04 / 18.04 and newer Ubuntu releases.
Step 1: Substitute your Ubuntu system packages
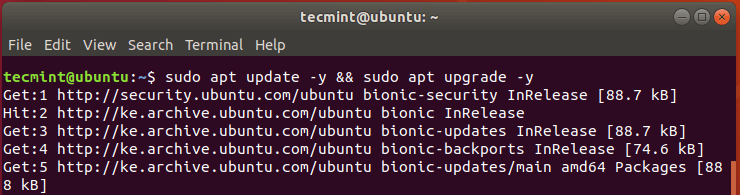
It is on a regular basis a superb suggestion to interchange system packages and archives above all else. So enhance and enhance your system by working.
$ sudo apt exchange -y && sudo apt enhance -y
Step 2: Arrange Apache and PHP on Ubuntu
Joomla is written PHP and save the data MySQL double material. In addition to, prospects can entry wherever Joomla based web page through a browser, and for that cause we now have to arrange Apache serving web server Joomla pages.
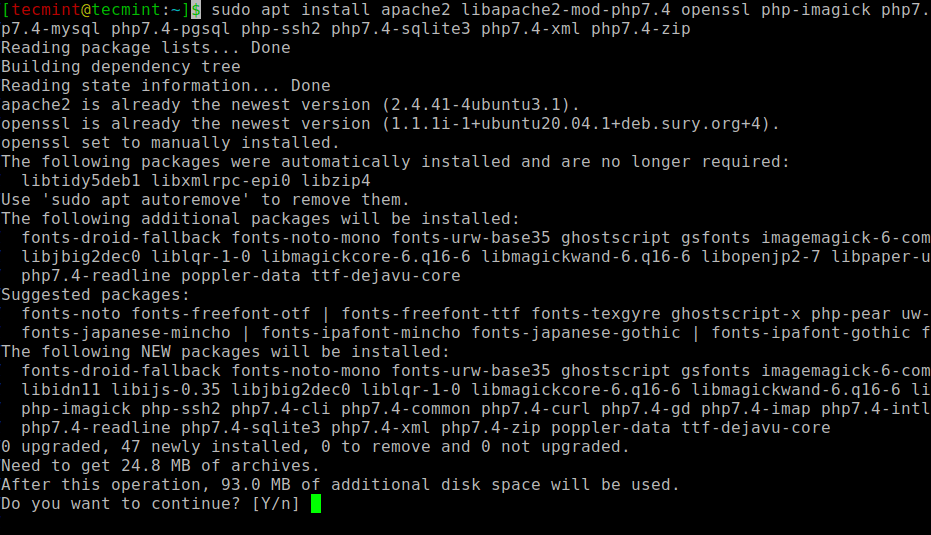
Arrange Apache and PHP (we’ll use PHP 7.4) Run the directions underneath in Ubuntu.
Arrange PHP 7.4 on Ubuntu 20.04
$ sudo apt arrange apache2 libapache2-mod-php7.2 openssl php-imagick php7.2-common php7.2-curl php7.2-gd php7.2-imap php7.2-intl php7.2-json php7.2-ldap php7.2-mbstring php7.2-mysql php7.2-pgsql php-smbclient php-ssh2 php7.2-sqlite3 php7.2-xml php7.2-zip
Arrange PHP 7.4 on Ubuntu 18.04
$ sudo apt -y arrange software-properties-common
$ sudo add-apt-repository ppa:ondrej/php
$ sudo apt-get exchange
$ sudo apt arrange apache2 libapache2-mod-php7.4 openssl php-imagick php7.4-common php7.4-curl php7.4-gd php7.4-imap php7.4-intl php7.4-json php7.4-ldap php7.4-mbstring php7.4-mysql php7.4-pgsql php-ssh2 php7.4-sqlite3 php7.4-xml php7.4-zip
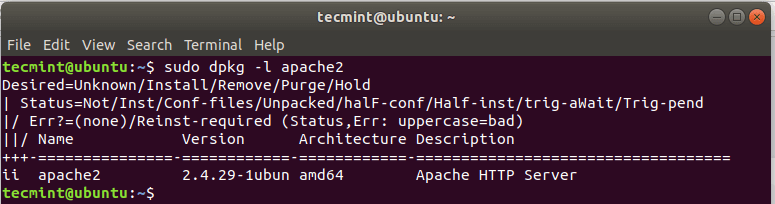
When the arrange is full, you probably can check the mannequin Apache put in by working the dpkg command.
$ sudo dpkg -l apache2
Start and permit now Apache web server.
$ sudo systemctl start apache2
$ sudo systemctl enable apache2
Affirm it Apache is working, run the command:
$ sudo systemctl standing apache2
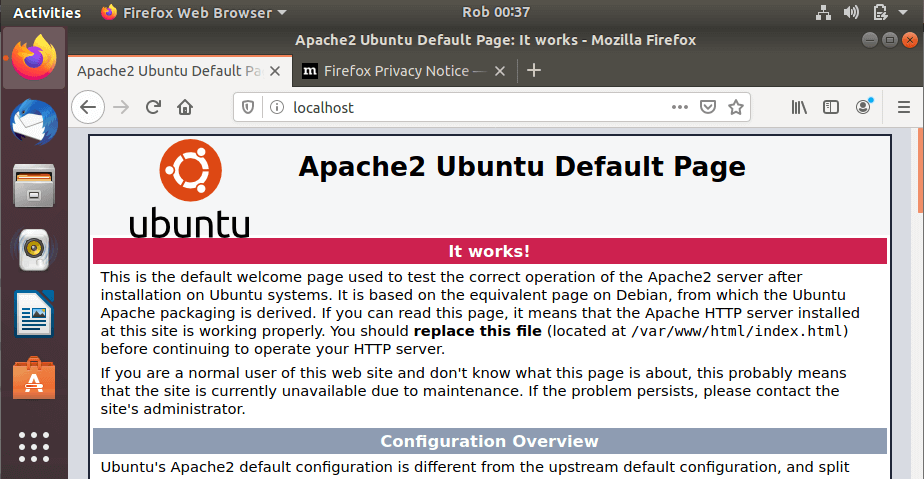
Now go to your browser and enter the IP deal with of the server throughout the URL bar as confirmed:
http://server-IP
You could get an web web site underneath that displays it Apache is put in and working.
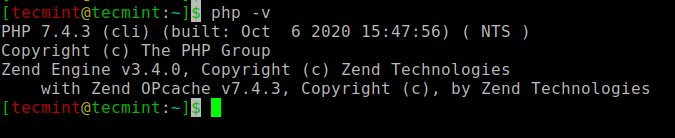
To substantiate if PHP is put in, run the command.
$ php -v
Step 3: Arrange MariaDB on Ubuntu
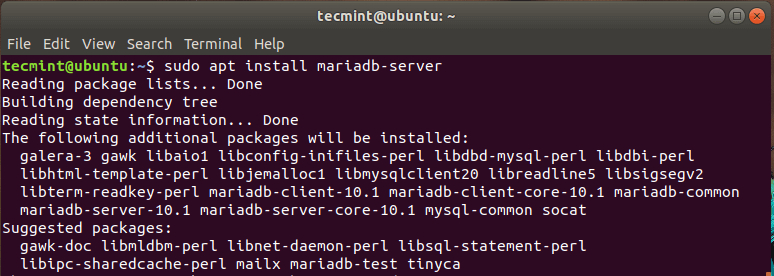
Since Joomla requires a database throughout the background to retailer data, we now have to arrange a relational database server. For this info, we’ll arrange MariaDB a server that could be a fork MySQL. It is a free and open provide database engine with enhanced choices and efficiency.
Arrange MariaDB Run the command:
$ sudo apt arrange mariadb-server
Since MariaDB is simply not protected by default, leaving it weak to potential breaches. As a precaution, we’ll protected the database engine
To carry out this, problem the command:
$ sudo mysql_secure_installation
Hit COME IN if you end up requested to enter the grasp password and press ‘Y’ set root password.

Write the rest of the half ‘Y’ and hit COME IN set it to the advisable settings that strengthen its security.
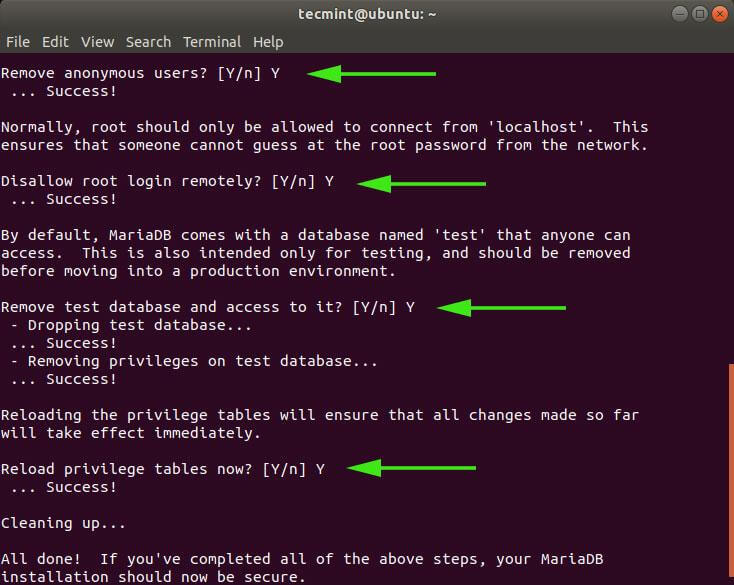
We now have lastly secured our database machine.
Step 4: Create a Joomla database
As beforehand talked about, Joomla outlets the data throughout the background system SQL server, on this case, MariaDB. So we’ll create a database to retailer the data.
First, you plan to log in MariaDB using the command:
$ sudo mysql -u root -p
You probably can create a database, a database particular person, and grant entry to a database particular person by working the directions underneath.
MariaDB [(none)]> CREATE DATABASE joomla_db;
MariaDB [(none)]> GRANT ALL ON joomla_db.* TO ‘joomla_user’@’localhost’ IDENTIFIED BY ‘[email protected]’;
MariaDB [(none)]> FLUSH PRIVILEGES;
MariaDB [(none)]> EXIT;
Step 5: Receive Joomla in Ubuntu
At this degree, we’ll acquire the arrange file from Joomla’s official website. On the time of writing, the latest mannequin is Joomla 3.9.26. To acquire the arrange bundle deal, run the wget command underneath:
$ sudo wget https://downloads.joomla.org/cms/joomla3/3-9-26/Joomla_3-9-26-Regular-Full_Package.zip
When the acquire is full. We’ve to extract this to the webroot itemizing. So let’s make an inventory and identify it ”JoomlaChances are you’ll give it any title.
$ sudo mkdir /var/www/html/joomla
Extract the next compressed Joomla file to the one you merely created ‘Joomla‘index.
$ sudo unzip Joomla_3-9-26-Regular-Full_Package.zip -d /var/www/html/joomla
Everytime you’re carried out, set the itemizing proprietor to the Apache particular person and alter the permissions as follows:
$ sudo chown -R www-data:www-data /var/www/html/joomla
$ sudo chmod -R 755 /var/www/html/joomla
Start., For the modifications to take influence Apache web server.
$ sudo systemctl restart apache2
Step 6: Configure Apache for Joomla
We’ll determine Apache server to server Joomla web pages. To try this, we create digital host info for Joomla and identify it Joomla.conf.
$ sudo vim /and so forth/apache2/sites-available/joomla.conf
Paste the configuration underneath proper right into a file and save.
<VirtualHost *:80>
     ServerAdmin [email protected]
     DocumentRoot /var/www/html/joomla/
     ServerName occasion.com
     ServerAlias www.occasion.com

     ErrorLog ${APACHE_LOG_DIR}/error.log
     CustomLog ${APACHE_LOG_DIR}/entry.log blended

     <Itemizing /var/www/html/joomla/>
            Selections FollowSymlinks
            AllowOverride All
            Require all granted
     </Itemizing>
</VirtualHost>
Subsequent, enable the digital machine file.
$ sudo a2ensite joomla.conf
$ sudo a2enmod rewrite
Then restart the Apache web server for the modifications to take influence.
$ sudo systemctl restart apache2
Step 7: Full the Joomla arrange in Ubuntu
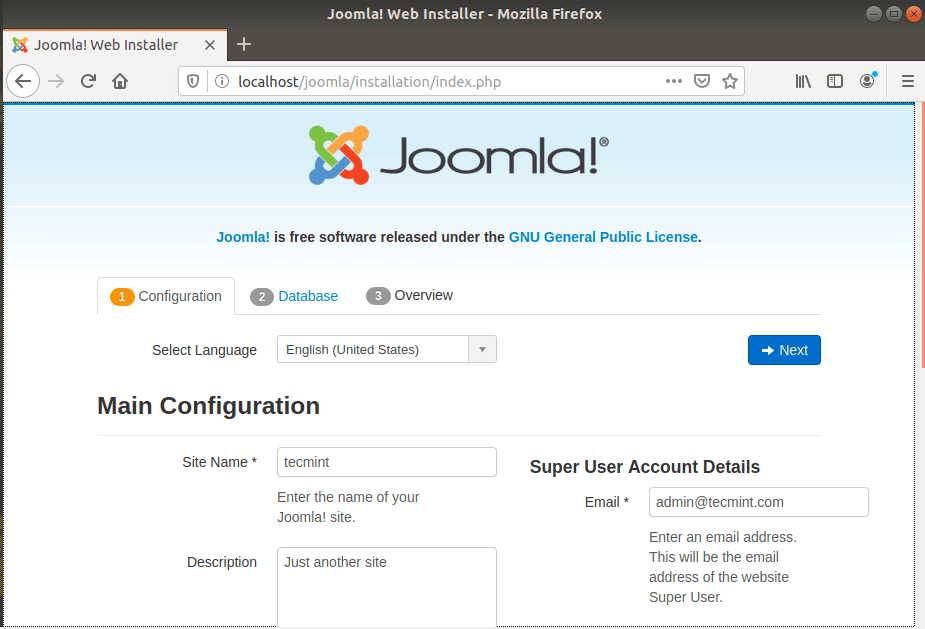
As quickly as the entire configurations are in place, the one step is the remaining configuration Joomla by the use of an web browser. Launch your browser and browse your server’s URL as confirmed
http:// server-IP/joomla
The online internet web page underneath is displayed. Fill throughout the required information, equal to web page title, e-mail deal with, username, and password, and click on onSubsequent’ button.
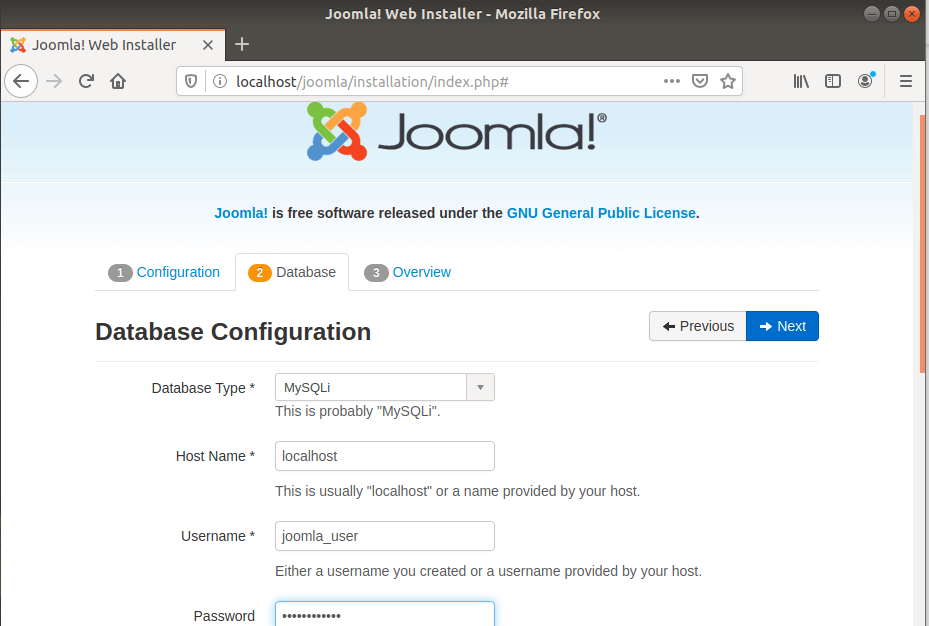
Throughout the subsequent half, fill throughout the database information, such as a result of the database form (Select MySQLI), the database particular person, the database title, and the database password. Then click on on ‘Subsequent“.
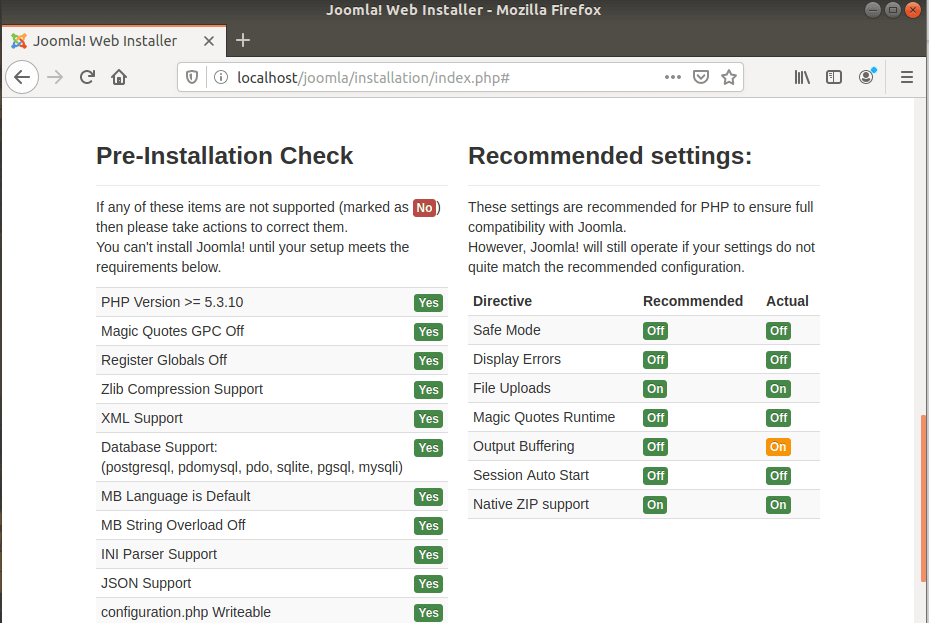
The next internet web page supplies an overview of the entire settings and allows you to perform a pre-installation check.
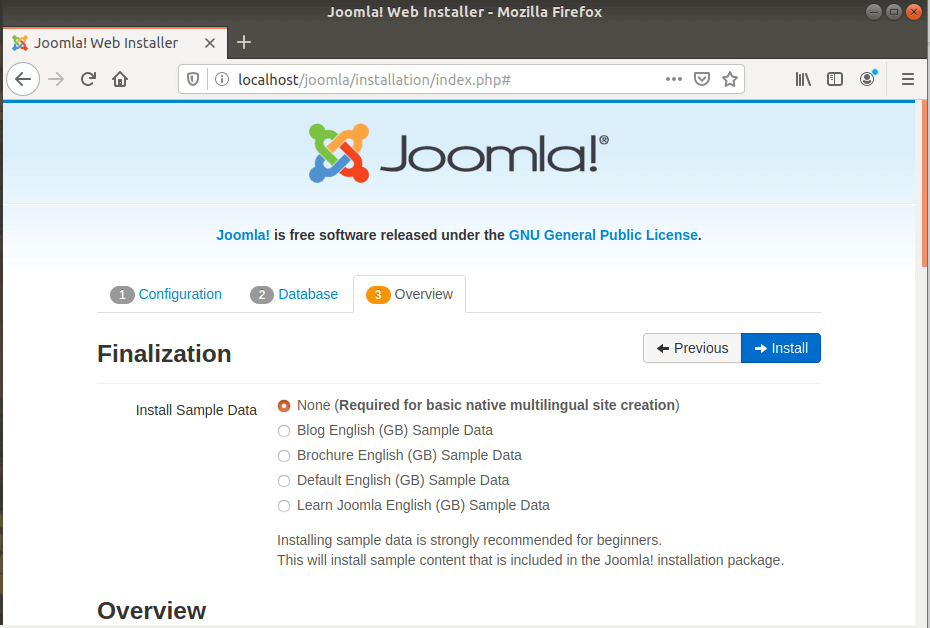
Scroll all the best way all the way down toPre – arrange check‘and’Actually useful settings‘and make it possible for each required packages are put in and the settings are proper.
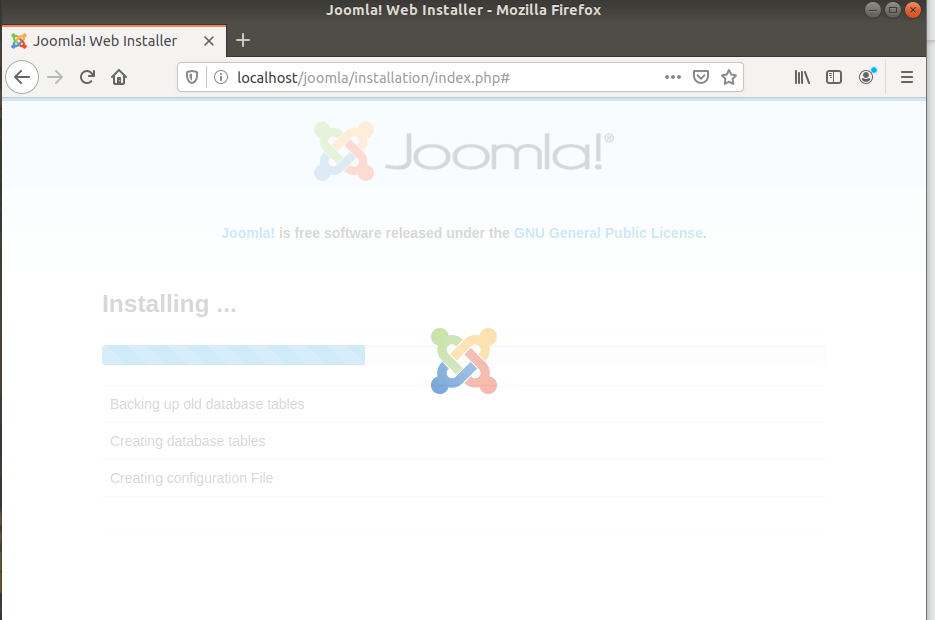
Then click on onArrangebutton. The Joomla arrange begins as confirmed throughout the picture.
If you find yourself carried out, you might be notified underneath that Joomla is put in.
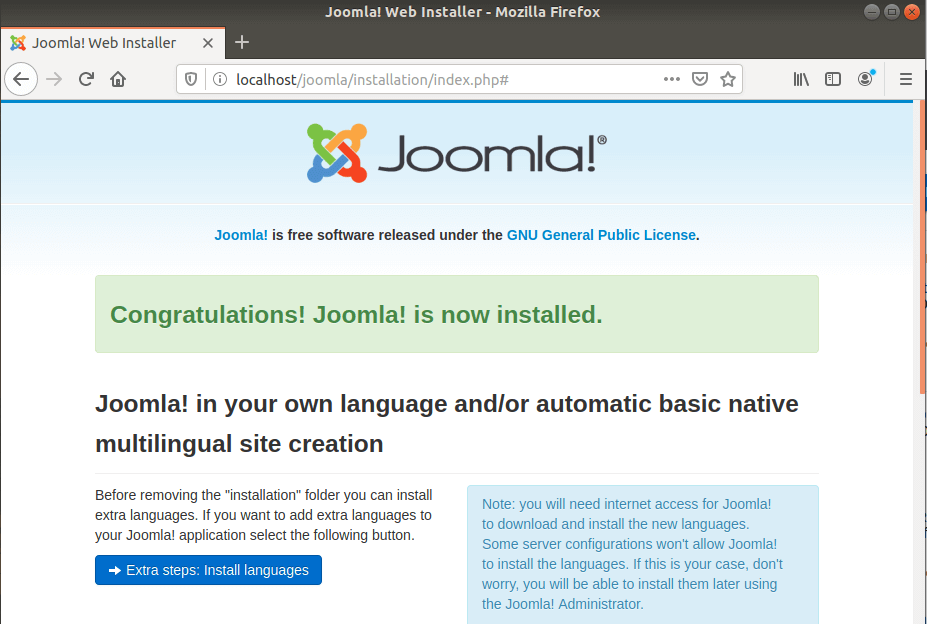
For security causes, the installer requires you to delete the arrange folder sooner than logging on. So scroll down and click on onDelete the arrange folderThe ” button appears underneath.
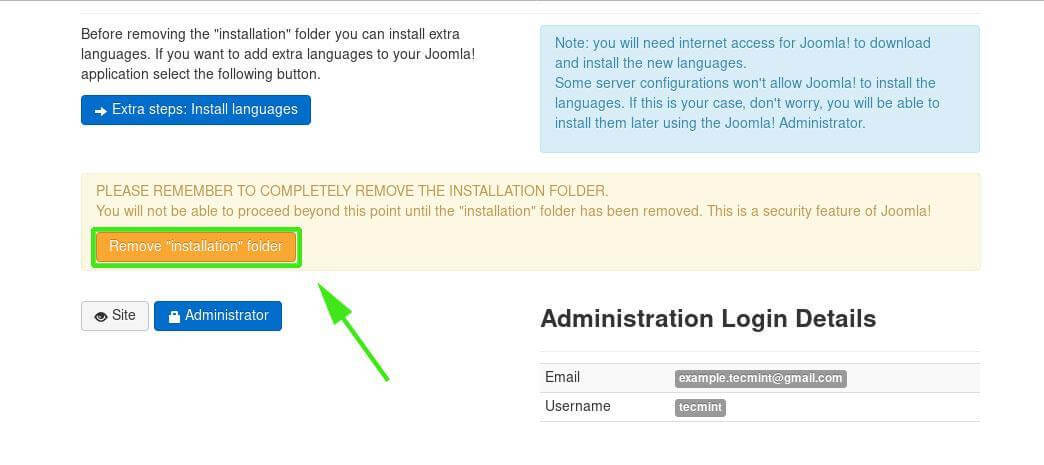
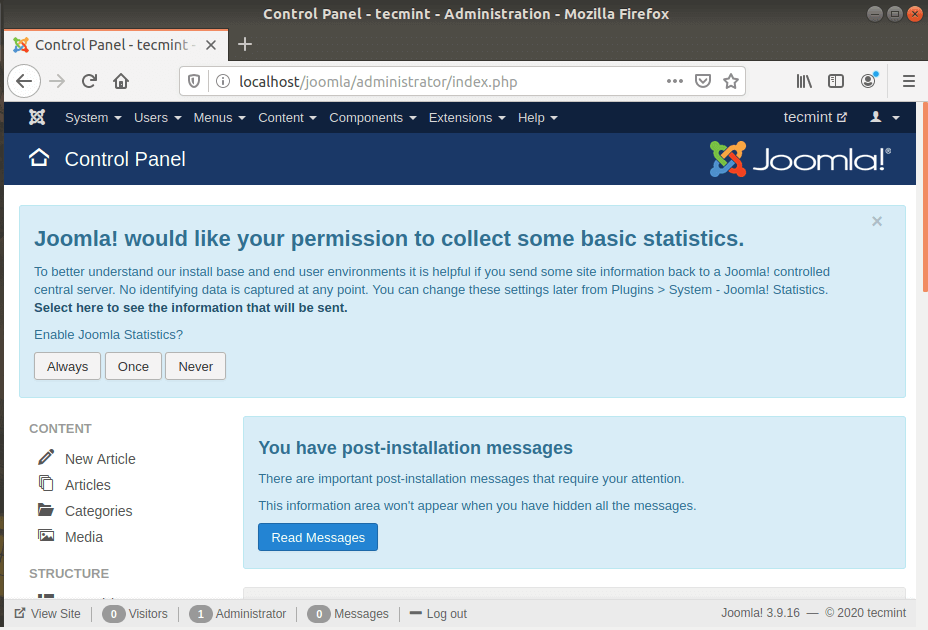
Click on on to log inAdministratorbutton that directs you to the net web page underneath.

Enter your username and password and click on onlog inbutton. It would take you to the Joomla Dashboard underneath.
Now you possibly can create your weblog and use different extensions and settings to bolster its look. We now have lastly accomplished Joomla on Ubuntu 20.04 / 18.04.