
This article Installing Zend was written earlier APC (Alternative PHP cache), but APC is obsolete and no longer works PHP 5.4 forward, now you should use OPcache to achieve better and faster performance, as explained in this article…
OpCache is an advanced caching module based on operation code that works in the same way as other caching solutions. It significantly improves the performance of PHP and, more broadly, your website by storing pre-translated PHP pages on your site in shared memory. This eliminates the need for PHP to load these pages continuously for each server request.
[ You might also like: 10 Top Open Source Caching Tools for Linux ]
In this guide, we will guide you through the installation Zend OPcache In Debian-based Linux distributions, such as Ubuntu and Mint.
We use for demonstration purposes Ubuntu 20.04 and shows you how to install and deploy the module as well Apache and Nginx web servers.
Install and configure PHP OPcache for Apache
To make the ball spin by booting your terminal and updating your package directory:
$ sudo apt update
Next, install Apache web server, PHP, and PHP including modules php-opcache module as follows.
$ sudo apt install apache2 libapache2-mod-php php-curl php-mbstring php-opcache php-mysql php-xml php-gd
The command installs the latest Apache web server and PHP 7.4 and related extensions. Check the installed version of PHP by running the command:
$ php --version

The next step is to deploy OPcache external memory module. So edit php.ini settings file.
$ sudo nano /etc/php/7.4/apache2/php.ini
OR
$ sudo vim /etc/php/7.4/apache2/php.ini
Find the following lines and delete their comments
opcache.enable=1
opcache.memory_consumption=128
opcache.max_accelerated_files=10000
opcache.revalidate_freq=200
Save changes and exit.
Then restart Apache to apply the changes.
$ sudo systemctl restart apache2
Finally, make sure Opcache has been introduced as follows:
$ php -i | grep opcache
The following result is displayed on your screen.
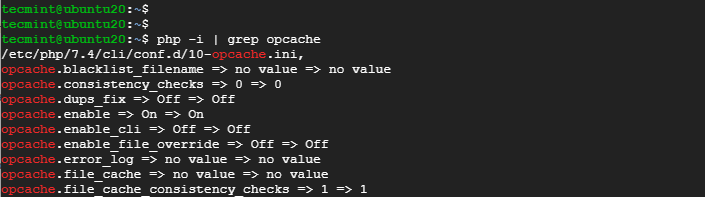
This is sufficient proof that Opcache the module has been installed successfully.
Install and configure PHP OPcache for Nginx
If you are going to get it Nginx as the web server of your choice and is still Opcache installed, follow the instructions below.
Install Nginx, PHP, and related PHP extensions as before.
$ sudo apt install nginx php php-fpm php-cli php-curl php-mbstring php-opcache php-mysql php-xml php-gd
Please confirm the installed PHP version again.
$ php -v
Go next php.ini deployment file Opcache.
$ sudo nano /etc/php/7.4/fpm/php.ini
OR
$ sudo vim /etc/php/7.4/fpm/php.ini
To enable, delete the following lines as before Opcache for Nginx.
opcache.enable=1
opcache.memory_consumption=128
opcache.max_accelerated_files=10000
opcache.revalidate_freq=200
Save changes and exit.
Then restart Nginx web server and PHP-FPM service.
$ sudo systemctl restart nginx php7.4-fpm
Finally, confirm it Opcache successfully installed:
$ php -i | grep opcache

And that was about the installation Zend Opcache external memory module. Your feedback is very welcome.
If you appreciate what we do here at TecMint, you should consider:
TecMint is the fastest growing and most trusted community site for all kinds of Linux articles, guides and books online. Millions of people visit TecMint! search or browse thousands of published articles that are FREE for everyone to access.


