
Xrdp is the open source equivalent Microsoft Remote Desktop Protocol (RDP). With xrdp installed on a Linux system, users can remotely access the Linux desktop using an RDP client, as we will show later in this article. It is completely free to download and use.
Let’s see, without further action, how you can install Xrdp On the Ubuntu desktop 20.04 and 18.04.
Qualifications
This guide assumes you already have a copy Ubuntu 20.04 or Ubuntu 18.04 the desktop is already installed. If you have a small installation – without an interface – install a desktop environment (such as GNOME) is recommended.
Install Ubuntu in a desktop environment, run the command:
$ sudo apt install ubuntu-desktop
Step 1: Install Xrdp on Ubuntu 20.04
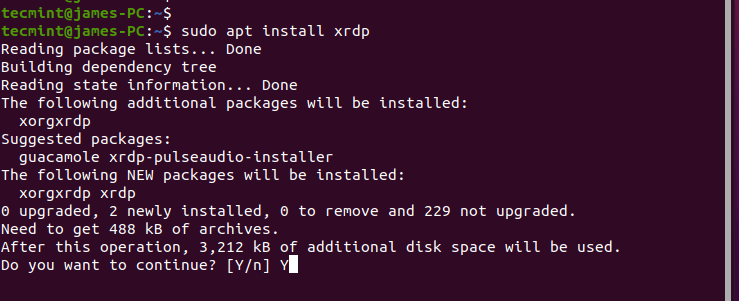
To get started, start the terminal and install the following command Xrdp in your system.
$ sudo apt install xrdp
When prompted, just hit 'Y' and press Enter to continue the installation.
Xrdp the service starts automatically during installation. To check this, run the command:
$ sudo systemctl status xrdp
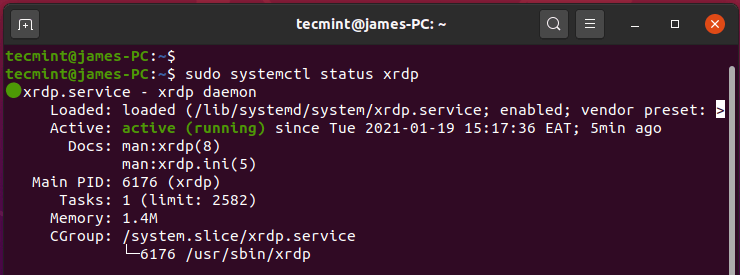
The result undoubtedly confirms that xrdp the daemon is active and running.
Step 2: Configure Xrdp in Ubuntu 20.04
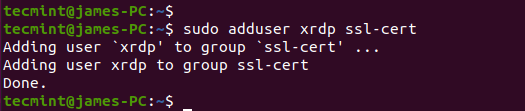
When Xrdp is installed, SSL certificate – ssl-cert-snakeoil.key – placed / etc / ssl / private / folder. We need to add an xrdp user SSL certificate group so that the file is readable by the user.
$ sudo adduser xrdp ssl-cert
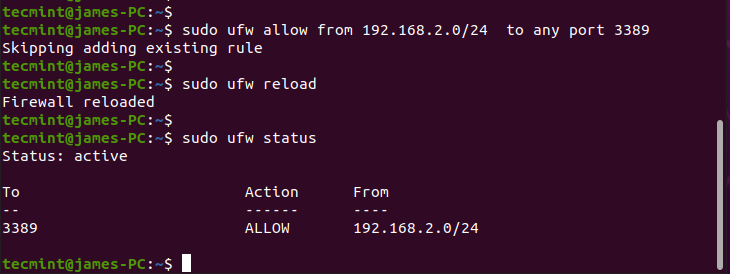
Xrdp listening to the port 3389 and if you are behind a UFW firewall, you must open the gate to allow inbound traffic RDP customer. In this example, I allow traffic from my entire subnet Ubuntu system.
$ sudo ufw allow from 192.168.2.0/24 to any port 3389
Then reload the firewall and make sure the port is open.
$ sudo ufw reload
$ sudo ufw status
Step 3: Use the Ubuntu Remote Desktop with an RDP client
At this point we are going to use Ubuntu desktop system Windows 10 using Remote Desktop Client. But before we do that, make sure you log out first Ubuntu 20.04. This is because Xrdp supports only one Xsession.
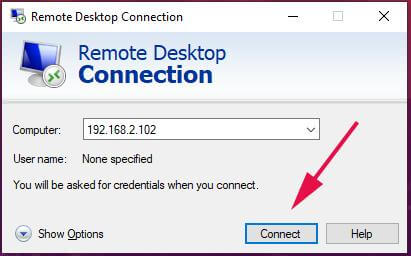
Next, launch the client and enter the IP address of the remote system and clickConnectbutton.
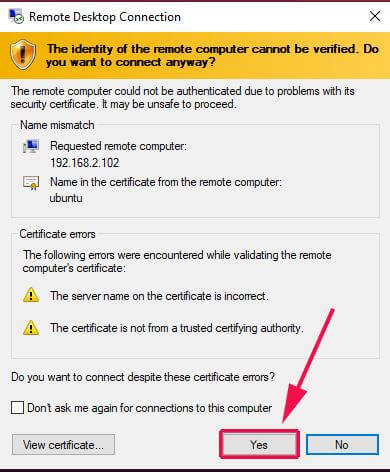
Ignore certificate errors in a pop-up window that requires you to verify the identity of the remote system.Next‘button to continue the connection.
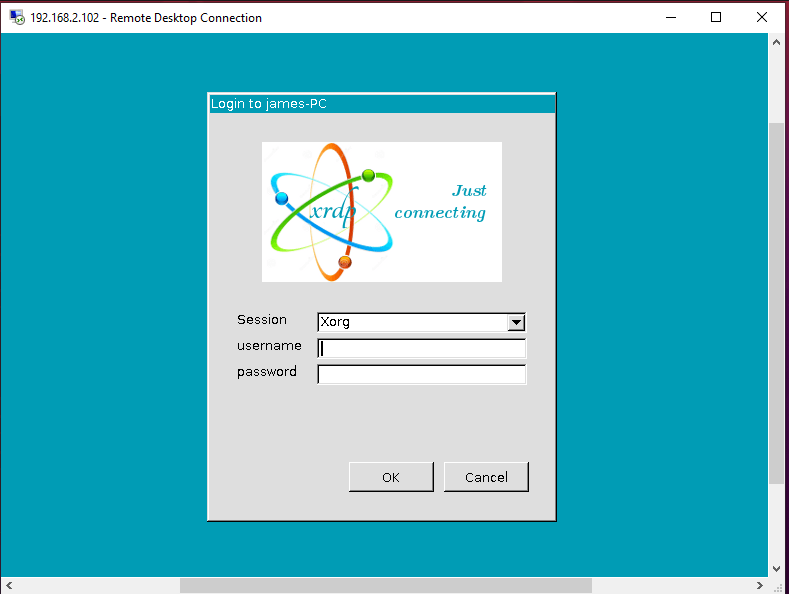
Its Xrdp log in, enter your login and click ‘Alright“.
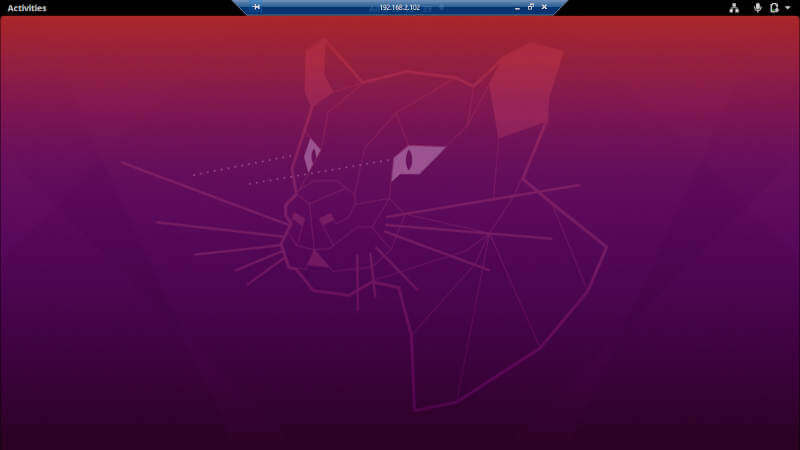
NOTE: At this point, you may encounter a blank black box instead of an Ubuntu desktop background. Personally, I met it in person and after some excavation I found a great workaround.
Fix black Ubuntu screen
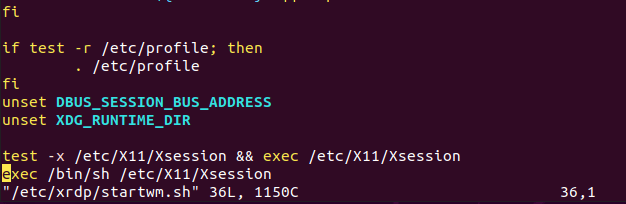
The solution is quite simple. Go to the remote system and edit /etc/xrdp/startwm.sh manuscript.
$ sudo vim /etc/xrdp/startwm.sh
Add these rows just before the rows you want to test and run Xsession as shown in the screenshot below.
unset DBUS_SESSION_BUS_ADDRESS
unset XDG_RUNTIME_DIR
Save the file and exit. Then start Xrdp service.
$ sudo systemctl restart xrdp
Next, start the connection again. After the initial authentication, you will need to re-authenticate as shown.
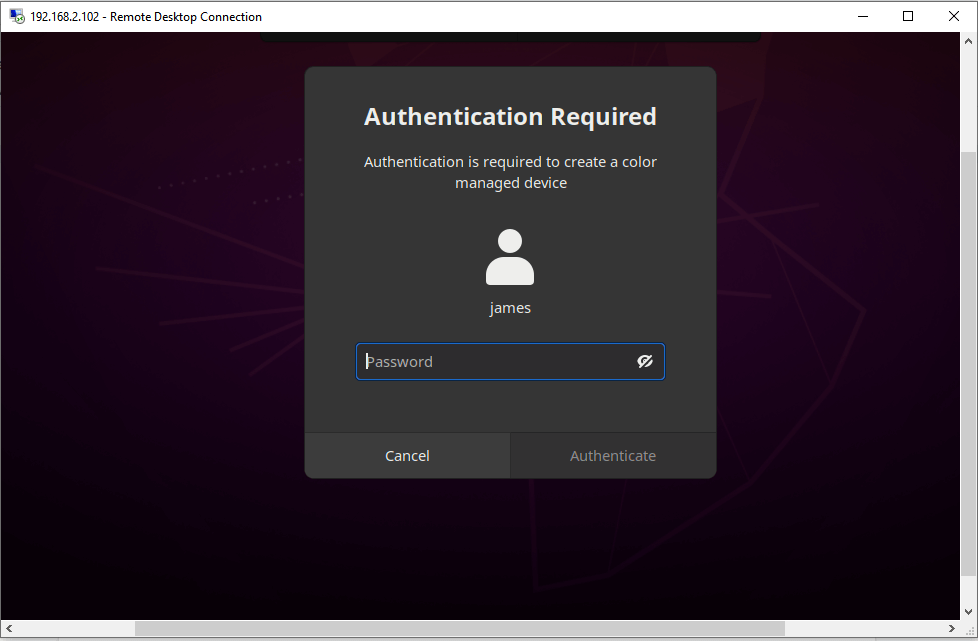
Enter your login information and click ‘Authentication‘and finally this will direct you to the Ubuntu Remote Desktop screen as shown.
We’d love to hear your feedback and the challenges you’ve faced in more detail. We hope this guide was helpful.


